 English
 Deutsch
 Français
 Italiano
 日本語
日本語 Español
 Português
 Russian
 Chinese (Simp.)
 捷克文
捷克文 Polish (Store only)
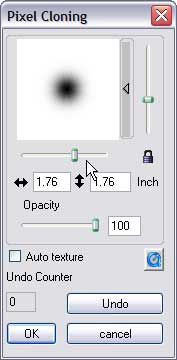
One of the other new features, which I am still trying to work out, is the Pixel Clone tool. OK so it works in much the same manner as does the Rubber stamp in Photoshop, but why does LaserSoft think we need this, after all most people will be scanning into Photoshop and as good as this SilverFast Pixel Clone tool is, it's nowhere nearly as good as the one in Photoshop. I would rather see an automatic numbering system in SilverFast - now that's what I would call useful.
The print image feature is a handy way to print out a contact style sheet of all the images on the flatbed, it also has limited DTP features, again this is better left to a dedicated application but nevertheless a useful addition.
 |
 |
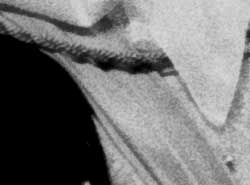
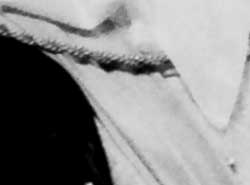
| The clone tool | PrinTao |
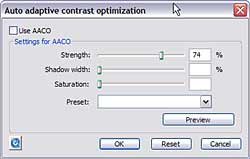
AACO stands for Auto Adaptive Contrast Optimisation, this preserves detail in the highlights for high contrast images. The downside to this filter is that it also accentuates the noise in the dark areas. The interface for the AACO was slow and sluggish and it also changes from the expanded view to a more compact view without even asking you - a bug fix is needed here. Photoshop's Shadow and Highlight filter does a good job with difficult images and offers more control.
 |
 |
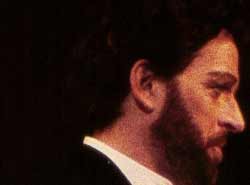
| No AACO | With AACO |
 |
 |
| The AACO interface - be quick or you will miss your chance to choose a preset or preview | |
There are lots of features throughout this version of SilverFast Studio including an IPTC Parameters dialog panel, this is also available in Photoshop, but you can launch SilverFast independently and enter all the image details, keywords, copyright notices etc.. When using SilverFast in Normal (File) mode you have the option to save files in JPEG 2000 mode.
Monochrome scanning
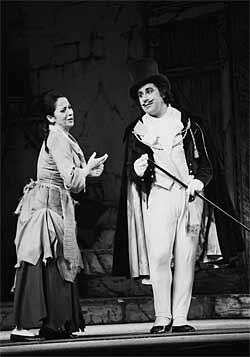
The Canon 9950F comes complete with an excellent set of film holders, ideal for scanning in your b/w negative collections. SilverFast has a good reputation with NegaFix so lets give it a spin. With the films loaded (x5 - 6 exp. strips) and a preview created, there isn't a auto frames feature, it would seem that you have to create 30 frames manually if you wanted to batch scan.
 |
 |
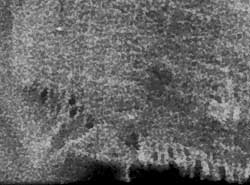
| Full frame 35mm at 2400dpi (Ilford HP5) | Excellent detail |
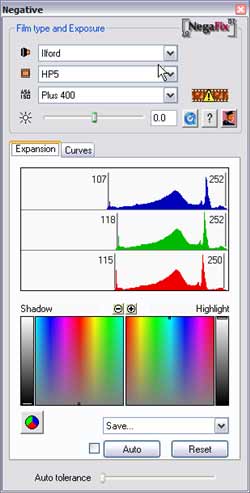
Monochrome negative scans lived well up to expectations, scanning in 48>24 bit colour produced a very slight colour cast but this can be easily fixed by scanning the image in 16>8 bit Greyscale. The NegaFix panel has tremendous scope for fine tuning Negatives (colour or b/w). The drop down list has profiles for most major b/w and colour negative films, but if you need to fine tune an image then there is an advanced mode. This lets you colour correct the RGB channels either by sliders or by curves. Using NegaFix also produced cast free scans. An excellent mini app. within the SilverFast software. However, using the normal tools within the SilverFast software also produced good scans, I am slightly puzzled as to why the extra controls in NegaFix have been included. Scanning times for 35mm b/w negs were a lot slower - 2 min 32:25 sec , ScanGear did the same scan in 1 min 31 seconds. The difference between SilverFast and ScanGear was not that great in monochrome scans, although SilverFast has more options to fine tune the final scan.
 |
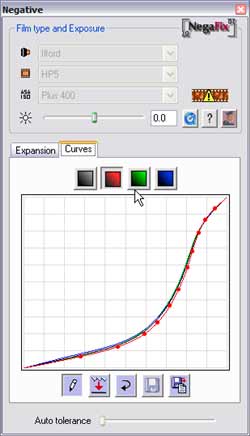 |
| Set colour corrections for negative films ... | ... or use the curves |
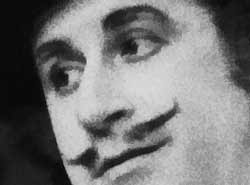
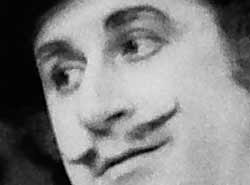
| SilverFast scans | ScanGear scans |
 |
 |
 |
 |
 |
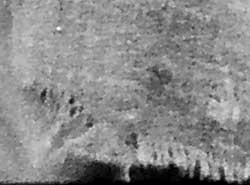 |
Looking at the above scans we can see that the SilverFast software is extracting far more quality detail, although at first glance you would think ScanGear is doing a better job. ScanGear seems to produce a higher contrast and this is what gives the image an initial impact. The last two details have had USM applied by the software, the middle detail scans have not had any USM applied.
(Source: photo-i, Vincent Oliver, 2005)