 English
 Deutsch
 Français
 Italiano
 日本語
日本語 Español
 Português
 Russian
 Chinese (Simp.)
 Tschechisch
 Polnisch (nur Shop)
SilverFast is a real-time processing application for scanning photographs and other images and correcting photography flaws when still in pre-scan mode. The pre-scan concept has a number of advantages. Corrections are performed on a low-resolution version of the photograph. This allows for faster screen refreshes, allowing you to see effects of corrections in real-time or near real-time. Another advantage is that pre-scan mode allows you to take advantage of all technical capabilities of your scanner. This is what sets SilverFast apart from other scanning software applications.
SilverFast has been conquering the market steady-on, simply because it enables users to obtain excellent quality from their scanned photographs with all the functionality required by even the most demanding professional. In the past, high-end scanner manufacturers would develop the scanning software for their own scanners, which would include an interface to all of the specific capabilities their scanners would have. Specially trained scanner operators would be the only ones who understood the software and scanner well enough to get decent results.
Today SilverFast is delivered with the most expensive drum and flatbed scanners such as the Heidelberg Topaz, all the way down to the most inexpensive offerings from Epson and Microtek.
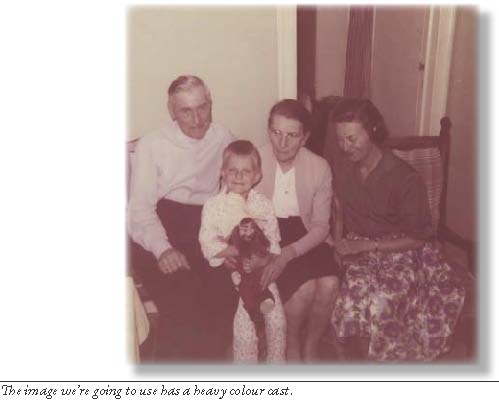
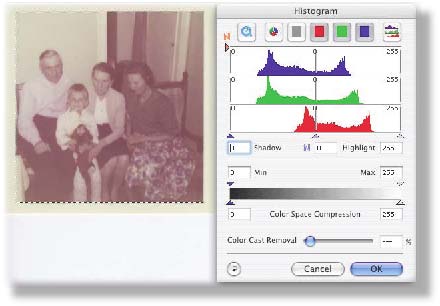
Personally, I have been an enthusiastic user of SilverFast since version 3 -when I first got the chance to test review a Microtek with SilverFast Ai driving it. For our first shot at colour correction, we're going to start with an image that looks prety muddy. It dates back to 1964, so it's well over 40 years old.
Setting the white and black point on your photograph
But before we start working our way through the measurements, we can try something else first, something much more simple: a click on the white and black pipette.

Working with a colour cast due to photo chemicals degradation
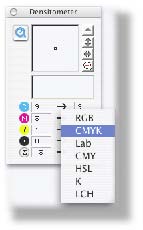
From the above photograph, it must be clear that there is a heavy magenta cast with some yellow. I can see that from the SilverFast Densitometer which reads out high values for Magenta and Yellow, and very low values for Cyan. I am using CMY here, but I can just as easily use RGB by Alt-clicking the Densitometer's value fields.
The white will be represented by an absence of ink, and the black will be saturated with black ink. This will result in a photograph that is lacking in detail in the extreme tonal values (the lightest and darkest areas). The lack of detail is only good with specular highlights -the reflections of sunlight on a pair of spectacles, for example.
The values of 0% and 100% are too extreme; values of 3% and 97% will guarantee that some detail will be printed in white and black areas. The next thing we'll do is find the brightest and darkest point in the image. SilverFast allows us to find those points easily using another tool found in the vertical scanning toolbar.
To display the brightest point of an image, you can either click and hold the white area in the icon, or type Command-Shift (ctrl-Shift in Windows) while in the prescan window. The darkest point can be seen by clicking the dark area of the icon or typing Command-Control (Control on Windows).
You would think you could use those points to set the white point and black point, but that's not necessarily the case. The brightest point does not necessarily equal the white point (which can be darker), although it often will. One situation when it won't, is when there are specular areas in the photo. In that case, you don't want the specular area to be your white point, as that would make the whole photograph turning dull!
MidPip Tool
To get rid of colour casts, SilverFast allows much more than just set the white and black points. It has the capability to set up 4 neutral points. This advanced tool lurks under the surface of the White / Black point pipette we just used. When you clicked the neutral area in your image, a numbered cross appeared on the image where you selected the grey point.
By going back to the pipette tool immediately after having set the first neutral point, you can set a second neutral point. You can repeat this process until you have 4 points marked in your image. Why would you want to do this? To remove colour casts that are not evenly "applied" over the entire photograph, you could try setting different areas to neutral, when you're certain those areas need to be neutral -e.g. because they display a grey painted object.
The MidPip dialogue can hold up to four readings. The top row of each reading holds the read-out of the area to be neutralised. The bottom row of each reading contains editable fields. Here you can adjust the automatic adjustments SilverFast made to the neutral areas.
MidPip4, as it is called, allows you to do that. In order to make this tool as powerful as it can be, you can also fine-tune the neutral settings for each of the points independently. To do this, double-click the pipette drawing in the White / Black point icon. The MidPip dialogue will open. If you noticed, for example, that setting one particular area to neutral, made the photograph look much darker in that area, you can edit the corresponding point in the table so that the area becomes lighter.
Another use for this dialogue is if you want different areas to have a slight colour cast. In that case, you would enter the appropriate numbers in the fields, making sure the values for the colours of the desired cast are higher than the other(s). However, when colour correcting photographs, you will usually want to use this tool for neutralising purposes, not to be creative.
Again, when you're not happy with the results, you can Alt-click the pipette drawing on the White / Black point icon, and the image will take on its original settings again. One thing you must bear in mind when using this tool is that SilverFast will not allow you to select an area that is not within specific values from a neutral grey. If it would allow you to do that, it would be too easy to set up the scanning parameters wildly different of what is on the scanner's plate.
Preserving specular highlights in your photograph
So you have set your white and black points, and your neutral areas. And what about the specular highlights in the photograph (if there are any)? The answer is that you have two ways of protecting those. The first is the easiest: just change the Highlight Offset in the Options dialogue (the Auto Tab) to zero. This will preserve the specular highlights for this photograph until you change this preference setting again.
If you want to keep your offset to the number that preserves the detail in white areas, you can accomplish the same by ficing a densitometer point within the specular highlight and then move the highlight end points in the histogram until you get the desired results. This also takes us to the next topic: the Histogram.
In SilverFast, there is no separate histogram from the Levels command as there is in Photoshop.

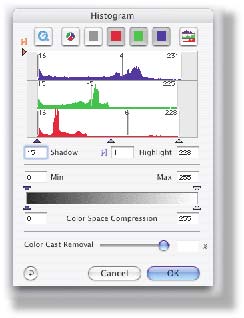
If you set the highlights and shadows using the SilverFast histogram, the available tonal values are expanded to fill all of the 256 greyscale values. The result is a more brilliant image. For colour correction purposes, the histogram allows you to correct the image by looking at the prescan image while moving the vertical lines in each of the colour channels -or the triangles at the bottom of the histogram if you wish to move all channel values at once. The prescan image will change in realtime, following the changes you apply closely.
You can also keep an eye on the densitometer. To see how a certain point in the photograph changes numerically, hold shift while clicking in the image. The densitometer point will be fixed at the cursor's location, and you can read the changes as you apply them.
In the histogram, the left triangle and vertical lines represent the shadow areas, the right triangle and vertical lines represent the highlights, while the center triangle and lines represent the neutral mid tones. The numbers show you how many units you are adding or subtracting from the light values at each of these points and which are characteristic of the image.
For example, dragging the left triangle to the right with 5 units will add 5 units (or levels) of the 256 available shades of tonal value to the shadow area of a photograph. This will normally open up the shadow areas and show detail in them.
To remove colour casts, you will have to first select a neutral area in the photograph -one that you know or suspect to have been neutrally white or grey when the original was still good- then fix the densitometer on that point. The next step is to identify which cast is present. In our image the colour cast consists of magenta and yellow. I fixed the densitometer on the neutral point in the chair's back and switched the Histogram's colour space to CMY.
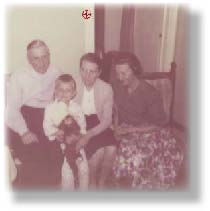
With the densitometer in mind, I could move the magenta and yellow vertical lines to different locations until the densitometer read a neutral grey. In RGB, this was the result:
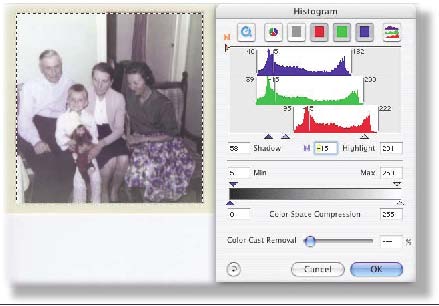
For badly affected photographs like the one above, working with the histogram can quickly become a messy process of dragging lines to left and right without getting the result you are after, but for a start, it's not bad. The histogram is perhaps not the best tool to correct badly discoloured photographs. But not to worry: SilverFast has other tools that are even more powerful.
One of SilverFast's powerful tools to correct photographs for bad colours is the Global Colour Correction Tool. How to correct photographs using this SilverFast tool is covered in the next issue.